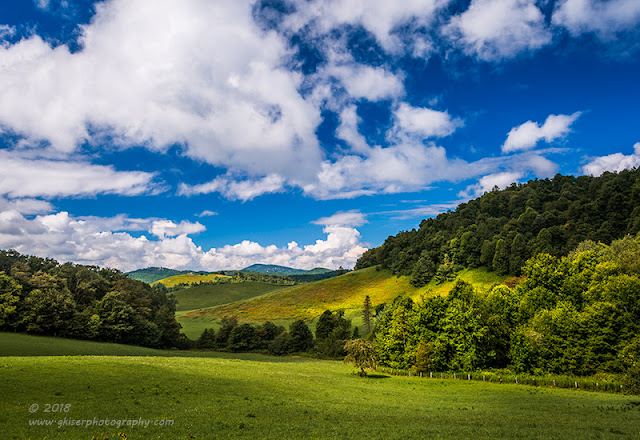
A Rural Kind of Evening

Saturday, August 25, 2018

Rural Twilight
These have been interesting times for me over the last two weeks.  There has been a lot going on in pretty much every aspect of my life since the last trek to the Blue Ridge Parkway a couple of weeks ago.  Last weekend, there just wasn't time to get out and do any photography.  This weekend, I had a little bit of time, but not too much.  The problem this weekend was the weather.  The forecast pretty much called for very little to no clouds for the good parts of the day.  The good parts are the ends at sunrise and sunset.  I was pretty much set on not going out to get any pictures this weekend, which was fine.  I still had a good many from the Parkway to handle my daily Instagram posts.

I did wake up around 5am on Saturday morning to check the weather since there was a chance of a decent sunrise in the Piedmont.  I wasn't sure where I would go, but I wanted to be able to get out and do something if the weather looked promising.  The reports were pretty dismal though.  I saw no clouds, and the sunrise forecast had gone pretty blah overnight.  I turned the alarm off and went back to sleep.

When I finally woke up, I wasn't even thinking about doing pictures.  Toni, Sierra, and I went out and visited the book store, went to a movie, and then had dinner.  All the while there were pretty nice clouds that developed in the sky.  Unfortunately, the sun was high in the sky, and while the clouds were nice, the lighting was harsh and flat.  Toni kept telling me to go and work on some pictures, but with the existing lighting I had no interest in shooting anything.  I was hoping that the clouds would hold out till sunset as they would look really good then.

When we got home after dinner I started to look at the weather forecast.  It wasn't really looking promising for clouds, and the sky was fairly empty at this point.  The sunset forecast, however, gave me a little hope for some color in the sky.  It might not be much, but it was worth going out and trying.

The Simple Life
Now I needed to come up with a location to go.  I have been trying to shoot a barn nearby for several months now, and I keep getting stymied by the sky at every turn.  I have been trying mostly in the morning for a sunrise behind the barn.  The idea has always been to get there long before the sun comes up and trying to capture some interesting colors in the sky, while still being able to expose for details in the barn.  Twice now I've tried that and failed.  I have also been out trying for some cloudy shots, but to no avail.  It has been about 4 years since I have successfully shot this barn, and I wanted to get it in the summer before the trees started to change, or shed their leaves.

I went ahead and set my course for the barn off of Union Cross Rd in Forsyth County.  My thought was I would probably get there and turn around, or sit for a while before deciding to give up.  I know, this is a terrible attitude to have, but honestly, I didn't really feel like going out.  Had it not been for Toni prodding me, and my memory of many landscape photographers' vlogs talking about going even when you don't want to, I would have stayed home.  Even if I didn't get anything, the weather was nice and it would be nice to get behind the camera for a short time if nothing else.

When I arrived, the lighting was actually pretty good on the barn with the setting sun lighting the face.  I went ahead and got the camera out and fitted my 70-200mm lens with the Sigh-Ray Color Combo Polarizer.  I actually stayed across the road to get the composition that I wanted.  Since there was not much interest in the sky, I wanted to minimize the amount of sky that I included in the shot.  I mainly wanted to get the barn, and the tree that stood next to it.  The plan here was to shoot a color image of the barn, but when I got home and looked at it, the colors were just lacking something.  I liked the lighting and composition though.  I decided to see how the sky would stand a monochrome conversion.

Once I got the conversion started, I could tell that the clouds were a little more visible, and the textures of the wood and crops stood out more.  I worked with the contrasts and tonal relationships until I was happy with the image.  It wasn't what I had envisioned when I shot the scene, but it wasn't bad either.  It was a good start to the evening.

Carolina Farm
The sun was dropping now, and the lighting was improving.  The clouds were also coming into play above the barn.  I flipped the camera on its side and framed up a shot that captured the barn, tree, and the clouds above.  I was really liking this composition.  However, when I was looking in the review after the exposure was made, I realized something.  In my excitement to set the shot up, I had missed a power line right at the top third point, which is why I missed it.  I lined up perfectly with the grid lines in my preview screen.  I was going to need to get to the other side of the road and shoot under the power line.

When I got there, I knew that the long lens was the wrong choice for my new location.  I quickly swapped out to my 24-70mm lens and swapped the Color Combo Polarizer over as well.  I recomposed and found roughly the same image at 35mm that I had found at 70mm earlier.  This is the power of lenses, I can get the same compositions from wildly different positions.  I was also able to get a bit more sky and foreground in this image with the perspective change.  I grabbed a few exposures as the clouds moved across the sky.

I continued to shoot different compositions as the sun faded to my rear.  I was a little disappointed to see the best cloud formation in the sky, and also the best lit one, was to the South.  There was nothing at all to put under that patch of sky except a line of trees and a power pole with a lot of power lines draping across the scene.  This just wouldn't work at all.  Oh well, I had a nice barn to work with.

As the sun dropped out of sight to my rear, the colors started to change up significantly.  There were purples in the sky now, and the twilight sky was upon us.  I set up a few different shots, and exposed as close to the right of the histogram as possible without blowing the image out.  It looked terrible in the review image, but I knew that would be the case.  I needed it slightly overexposed so that I could keep the detail in the barn, and I could recover the sky detail easy enough in Lightroom.  I wasn't sure how any of these would turn out, but I knew if they worked, I would have something entirely different from anything that I had shot before.

When I got home and started to process it, it took a minute or two to start seeing the colors develop that I had seen while shooting the image.  What would normally take 5-10 minutes, probably took about 15 minutes to process.  I really started to see the possibility of this one looking like what I had envisioned while shooting the image.  Yes, this one might be a little more "worked" than most of my images, but I felt that it deserved a little extra processing to be true to my vision.  It is not manipulated, and is not a composite.  It isn't even an HDR image.  What it has turned into is a highly saturated image that has been dodged and burned to bring out the details that I found important to the image.  It is a true representation of the actual scene, and is spot on with how I interpreted the scene at the time.  

Just as I was about to pack up the camera, I started looking for the moon which was full.  I knew it would be coming up very soon, and it should be near the barn.  If I was lucky, I would get the opportunity to shoot the mood with the barn composition I had set up.  Unfortunately, it was a bit far to the right for that to happen.  I did move my position and shoot the barn square from the front with the moon just to the right.  The composition was weak, and there was really no excitement in the image.  It turned out to be one that I left in the discard file.  I added my 2x teleconverter and tried for a moon shot at 400mm just because it was rather clear looking.  It turned out pretty good, but I have just never really cared for moon shots that aren't a part of a complete composition.  It was just a moon, and it was no better, or any different, than any of the other hundred moon shots I have seen.  It fell to the discard pile as well. 

At the end of the evening, I had shot 59 frames of this barn and the moon.  I knew I didn't want my normal 10% cut to be keepers since this was just a single subject.  I was actually looking for one, maybe two images to keep.  In the end, I found that I really liked three images.  They were all quite different, and represented a different story of the barn.  I was happy keeping all three of the images and sharing them with you.

Sunrise at Rough Ridge

Saturday, August 11, 2018


Appalachian Daybreak
Does anyone remember the last time I went to the Blue Ridge Parkway?  It seems like forever ago to me.  Looking back in the blog, it appears that it was May 19th when I last visited the Parkway.  That is much too long for one of my favorite places to go when it comes to photography.  I've been wanting to get back there for a few weeks, but my scheduling has been such that I just couldn't dedicate that kind of time to a Trek.  That changed a bit this weekend with Toni at work, and Sierra with her Uncle.  I finally had the time that I needed to head West to the High Country.  The only thing left to determine was where to go exactly.

I looked at the weather, and it seemed that the chances of clouds were going to be better around the Boone, and Linville areas, while further North it was looking more like clear conditions.  Of course, we all know my track record with the weather forecasts so I really wasn't all that sure of what to expect.  The plan when I went to sleep was to get up at 3am and head out to Rough Ridge for a sunrise attempt.  Looking at the sunrise forecaster, I didn't have a lot of high hopes for any color, but there were clouds in the forecast and they were showing to have a low ceiling.  This meant that I might be able to do some woodland work along the Rough Ridge Trail.  Either way, I wanted to get an early start to the day.  From there, I was going to go where the conditions dictated.


Color on the Ridge
My day started as planned, way too early for my liking.  I checked the weather before getting out of bed and it looked like nothing had changed from the forecast that I had seen the night before.  The chance of a great sunrise was going to be slim, but the clouds were looking good for most of the day with a slight chance for a storm around mid day.  I went ahead and got things together and started my drive out to Rough Ridge.  the entire way there, I was seeing stars in the sky, and was really getting worried about the conditions I was going to be faced with soon.  I knew that whatever was going to happen, I was going to be in the mountains with my camera so it couldn't be too bad.

When I arrived on the Parkway, a familiar dynamic started with me.  One minute it was clear as a bell, and then all of a sudden visibility would drop to nothing due to fog and clouds.  Weather like this makes for some very interesting photography and I was getting excited.  I started looking for a good place to set up for sunrise in case a target of opportunity presented itself before I arrived at Rough Ridge.  As luck would have it, nothing really fell into place, and I found myself nearing the parking area for Rough Ridge.  Well, I was here, and there was only one other car in the parking lot.  Let's do this!

I grabbed my gear and started the dark (and rather soggy) hike to the boardwalk where I was planning on shooting the sunrise.  The hike went quick enough, and I was really happy that I had brought my waterfall boots in case the weather dictated that I start looking for cascades to shoot.  I slogged my way up the trail and found the rocky outcropping just off of the boardwalk to be completely empty which was a nice treat.  I went out on the rock and got set up on the smaller section closest to the boardwalk.


Bridging Colors
I had been running different compositions in my head while hiking up to the boardwalk and knew that I was wanting to try out my 16-35mm lens to get a little different perspective from my normal 24-70mm choice.  I started out with no filters at all, but quickly realized that the compositions that I was wanting to shoot were going to need some exposure help.  Starting out early, I added my Lee Filter Holder and a 3-Stop Singh-Ray, Daryl Benson Reverse ND Grad.  this helped the exposure in the sky right at the horizon, while letting the sky further up expose a little bit more.  that was just the trick that I needed to get the exposures as close to correct as I could.

While I was shooting the opening series of the new day, a couple came hiking up the trail and joined me on the rock.  He was apparently a photographer as well since he pulled out a camera and tripod.  He set it up to shoot intervals as the sun came up.  While the camera was firing off frames he got a drone ready, which he sent up to view Rough Ridge from the air.  It was quite an impressive display, but I just sat there and worked my compositions one at a time.

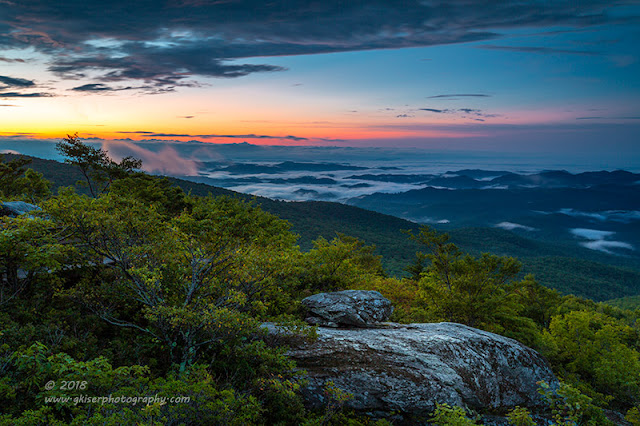
As the sun came up and the colors started to fade towards the East, I decided to swap out lenses and use my 70-200mm lens to get some isolations of the clouds in the valley below.  Since I wasn't shooting into the bright part of the sky, I opted to leave the filters off of the lens and just shoot as the scene appeared.  What I found was as the color faded to the East, it started to pick back up to the West, and I had a lot of great color in the sky to play with.


Vibrant Viaduct
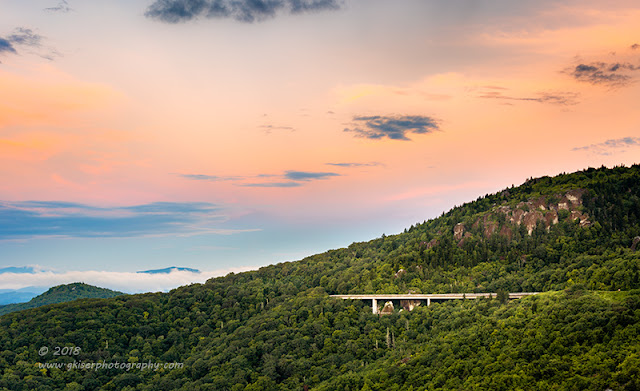
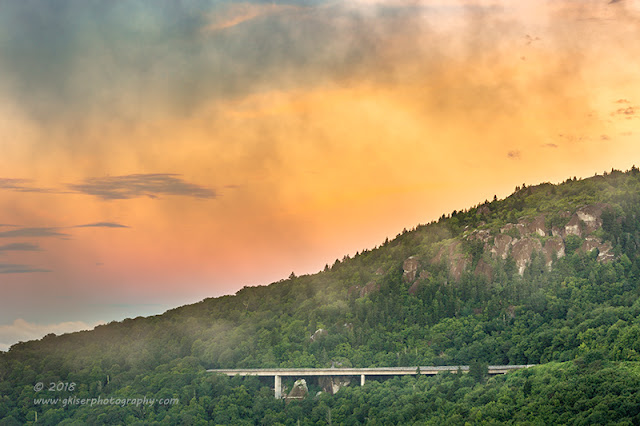
Something that I am always seeming to photograph when I visit Rough Ridge is the Linn Cove Viaduct which is visible from many portions of the trail.  With the 70-200mm lens, I can just about reach out and touch it.  With the colors that were developing in the Western sky, I was able to photograph the Viaduct in a way that I hadn't been able to before.  I was actually getting sunlight on the side of the mountain and the warm light was doing really cool things with the clouds above.  As I worked this unique situation I noticed that there was another element that was working its way into the frames.  There was a thin cloud coming between me and the Viaduct, and as it reached the frame it provided a really nice layer of fog to the image.

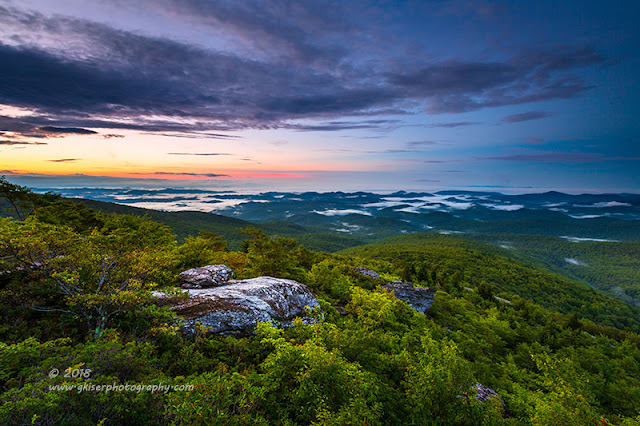
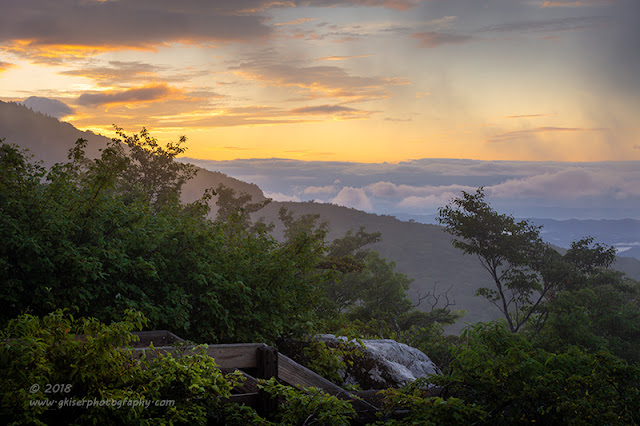
The Viaduct wasn't the only part of the landscape that was looking really nice.  The sky to the East was actually starting to erupt in color again and since the sun was partially hidden, the exposure looked very workable without any filters.  I trained the camera back around and framed up a shot at 70mm that included part of the boardwalk as well as the sky above.


Tanawha Tales
My main purpose in this shot was to get the sky, but I wanted something interesting in the foreground to anchor the image.  Not wanting to lose the light, I shot it with the long lens and made due the best that I could.  As it turned out, the little hint of the boardwalk and the rock made for a great foreground, and didn't weigh in too heavily at all in the composition.  The colors in the sky were great, and the low clouds across the mountains in the distance really added the depth to the image that I needed.  There was still the slight haze from the passing clouds which gave the image a dreamlike quality that I really liked.

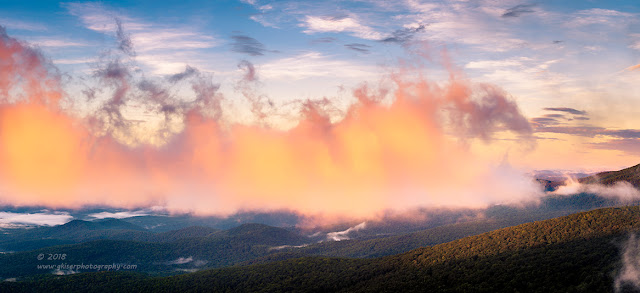
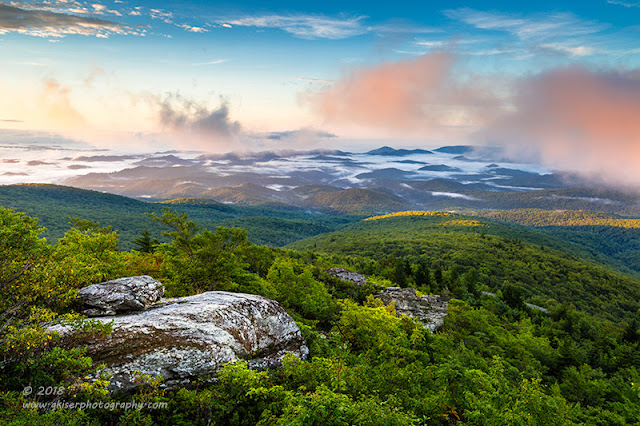
With all of this back and forth, I was starting to become overwhelmed at the list of potential subjects.  As I was finishing up the shot over the Tanawha Trail, I happened to look back to my right and saw something that I can only describe as amazing.  While the sky above was starting to settle into the normal hues, there was a large bank of clouds that was on the way across the mountains that was bathed in an orange and pink hue from the sun.  I'm not quite sure how that happened, but it was just too cool for words.

I decided that was going to be my next shot.  I just had no idea how to capture it.  I was still shooting with my long lens and I was able to get a few shots of the clouds, but nothing that I really liked.  I decided that I would try a panorama of it.  I flipped the camera on its side, and leveled the tripod.  I made a quick sweep to confirm that the camera was going to be level the entire trip across the image.  I set my focus and exposure and shot a six frame series that I later merged in Lightroom.


Blue Ridge on Fire
This panorama isn't one of my best ones.  It lacks the prior planning that most of them really need.  It is a great documentation of of the cloud that I saw which was just so freaking amazing though.  The clouds above and below this one bank of clouds were all pretty much normal hues by this point, but this one cloud was like watching a flame move across the Blue Ridge Mountains.  It was just incredible, and I'm glad that I thought to make this a panorama shot since swapping lenses would have allowed the light to be lost more than likely.


A Ginger Sky
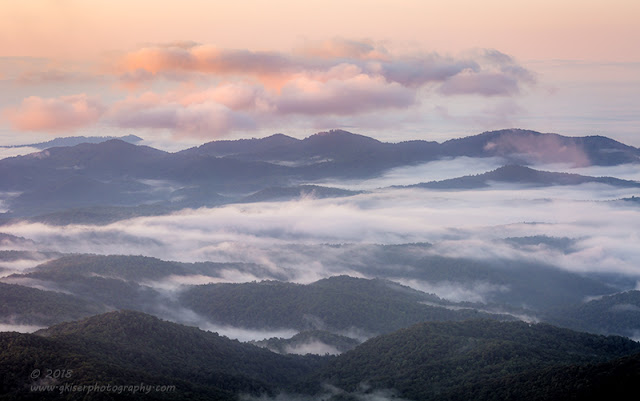
When I got done shooting the panorama, I went back to shooting single frame images of the cloud in an attempt to capture the unique look of this situation.  I followed it all along its path until it was pretty well hidden by the peak to the East of the trail.  As the cloud moved on, I could see that most of the color was now gone in the sky except for a small area to the South.  I could see some remaining color in some of the clouds above the mountains and figured that I would give them a shot as well.  They were far enough away that the long lens was a fine choice to capture them.


Feeling Peachy
The composition here was a simple one.  I was focusing on the low clouds in the valley below and using the clouds as a framing element and pretty much the only color in the image.  I thought about doing this as a monochrome image, but that hint of warmth really helps the clouds stand out from the valleys.  After shooting this image, I was starting to see the blues really coming into play in the sky, so I decided to swap out my lenses one last time.  I put the 16-35mm back on and added a 2-Stop Singh-Ray, Galen Rowell hard edge ND-Grad filter to the front.  This was going to take the place of a polarizer since I didn't want to cause uneven blues in the sky which is a risk using a polarizer.  This would also allow me more flexibility in darkening the sky regardless of my angle to the sun.


Sun Drops
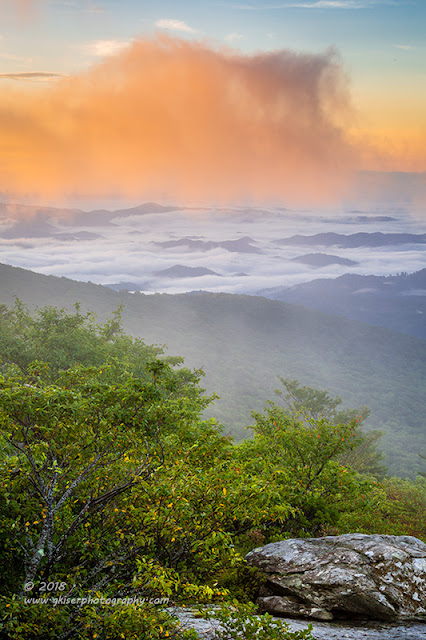
When I got the camera all put back together and ready to shoot I noticed that there was another bank of clouds moving across the valley that looked very similar to the earlier ones.  These were a good deal lighter since the sun was still climbing in the sky, but the color was still there.  The ND-Grad did an excellent job at bringing that color out by avoiding overexposure.  I shot about four frames with this concept, but slightly different compositions.  This was the one where the color showed the best, and the composition felt slightly better than the other ones as well.  Honestly, this was the first image that I shot from the morning that I really felt good about.

The funny thing was, I thought that I had shot about 45 frames during the sunrise.  As it turned out, I had shot 79 frames in about an hour and a half's time.  My how time flies when you are having fun!!  It was time to move on to other things though.  I went ahead and packed up the camera and started moving my way back down the trail to the truck.  When I got there, I could see that the clouds were mostly clearing out at this point.  It was also that strange time of day after the golden hour when the sky is just white.  I wasn't looking to do much in the way of landscapes at this point until the sky got better again.

What I decided on was taking a little drive to a road that I had seen on the map earlier.  It was Roseboro Rd, and it was just a little beyond the Viaduct.  I had spotted this on the map because it looked like a good secondary road to find some old barns on.  When I found it and turned, I found that it was a typical gravel mountain road.  Oh well, I needed to spin the 4WD for a few miles this month anyway, I dropped into 4Hi and continued on down the road.


Roseboro Falls
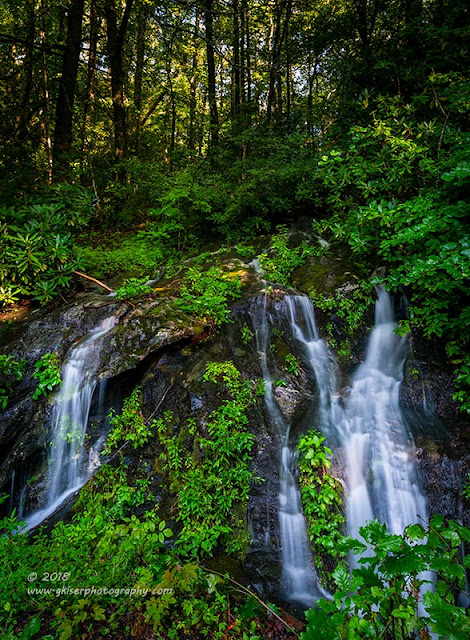
In an interesting turn of fate, I didn't find a single barn that I wanted to photograph on this road, but I did find a waterfall that to my knowledge is unnamed, and possibly only here during high rainfall times.  Conveniently, there was a pull out on the side of the road a short distance from the waterfall which leads me to believe that this waterfall is a fairly typical feature.  At any rate, I grabbed the camera and loaded the 24-70mm lens along with the Singh-Ray Color Combo Polarizer.

With this waterfall right off of the road, my compositions were limited.  I tried some isolations, but the moving vegetation proved too distracting for the isolations to work.  By capturing more of the falls, I was able to minimize the motion blur issues to a point.  The composition that I settled on was one that actually included the sky peeking through the trees above the waterfall.  I was worried about the exposure, but my histogram was telling me that I wasn't blowing out too many pixels by shooting this composition.  It actually was a pleasing shot of this odd waterfall stuck on the side of the road.

I didn't have long to work with this waterfall though.  Remember how I said there were no clouds in the sky after I finished up at Rough Ridge?  Well, the sun was now starting to shine through the trees and it was hitting the waterfall in a splotchy fashion.  After maybe 15 minutes, I packed up the camera  and continued down the road in search of a barn.  I did find one, but the lighting was no good for it, and the setting was a little bland as well.  I passed on the chance to do anything with it.


Keep it Together
I did my normal get lost thing in hopes of finding a good barn to photograph.  As luck would have it, I didn't run into anything promising before finding my way back to Hwy 221 and eventually the Blue Ridge Parkway.  I started my way North hoping to find a few things to shoot before getting on the road home.  As I was passing through Julian Price Park, I happened to notice that there were some clouds moving into view over a field that I enjoy shooting near the red barn that is so famous.  I went ahead and pulled off on the side of the road and grabbed the camera.  For this situation, I wanted my 24-70mm lens so that I could shoot up close and wide angles as well.  I added my Singh-Ray Color Combo Polarizer as well to really help the clouds to pop against the blue sky.  Since I was going to be shooting roughly ninety degrees to the sun, the polarizer was going to work very well.


Summertime Blues
As I was shooting, the clouds were getting thicker and thicker.  I was so glad that I stopped since I really like having these kinds of clouds in my photos.  It just adds so much life to the image.  I was shooting composition after composition.  I slowed long enough to let traffic pass by when I was shooting from across the street.  I did have the opportunity to watch about a dozen cyclists ride through the area which made me remember the several rides I had done on the Blue Ridge Parkway.  I knew the struggles that they were involved in, and I kind of missed it...But, I had pictures that I needed to be working on, so I got my mind back in the moment and worked on more compositions.


Split Rail Dreams
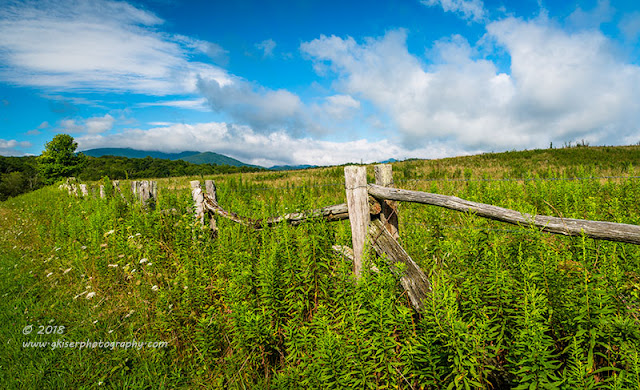
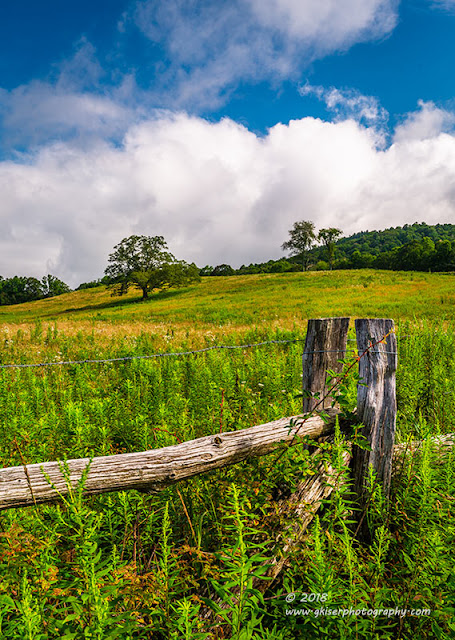
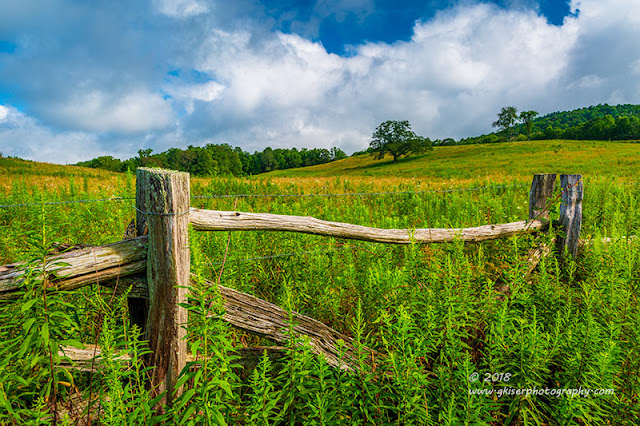
For longer than I can remember, I have enjoyed photographing this one lone tree in the field.  That is usually the reason that I stop here when I do.  Something else that I really enjoy doing is photographing the fences along the Parkway.  While I was setting up shots I decided that I would probably do well to include both of these subjects in a composition.  I flipped the camera on its side and framed up a composition that had good visual balance, and took full advantage of the fence as a visual anchor.  The clouds were really starting to come in nicely by this point, and I was having a lot of fun picking out views to put under the clouds as they appeared.


Time Well Wasted
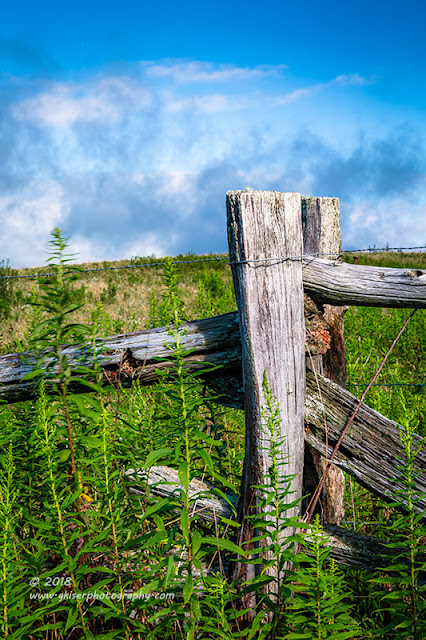
I wasn't going to let this great fence get away from me.  The overgrown weeds really created the perfect story for this fence, and I found a section that was very easy to isolate.  I managed to work compositions in both vertical and horizontal orientations to go along with the tree in the background.  The textures and colors really stood out, but that was what I was really liking about this fence and the field where it was standing.  The greens of the weeds and grasses complimented the yellowing sections quite well.  The bleached wood of the fence maintained its own visual weight despite being largely consumed by the vegetation.  But was color really all that necessary for these images?


Monochrome Malaise
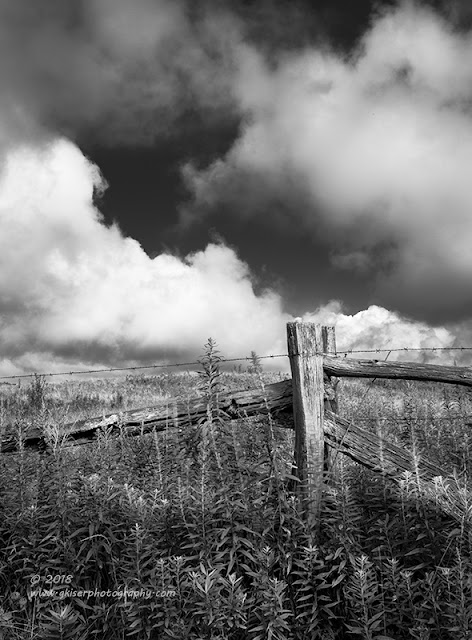
I wanted to find out, and actually set up a shot as a black and white image.  What made this one different from the others in the series was the sky.  There was a section of blue that was completely surrounded by clouds.  This was the perfect scenario for a black and white conversion since I like to render my blue skies as dark grey.  By putting a single post in the bottom right third, I was able to visually anchor the image.  I shot it in color, but I had full intention of making this one monochrome when it came time to edit it.  After I did the conversion, I could see that my previsualization worked just fine for this image.  It all came together so nicely as a black and white image.  The clouds popped, and the textures of the weeds and wood really stood out with the color stripped from the image.


Mountain Motorway
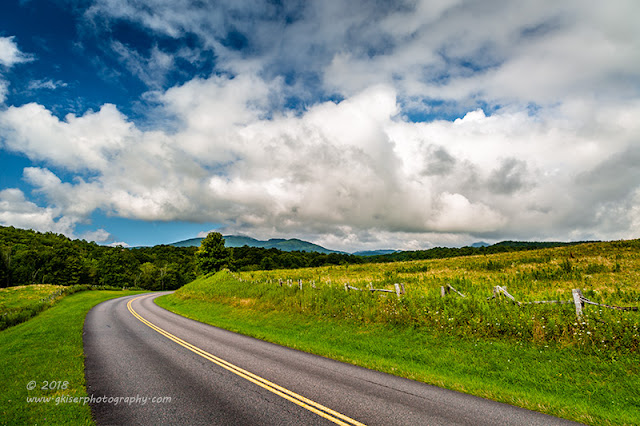
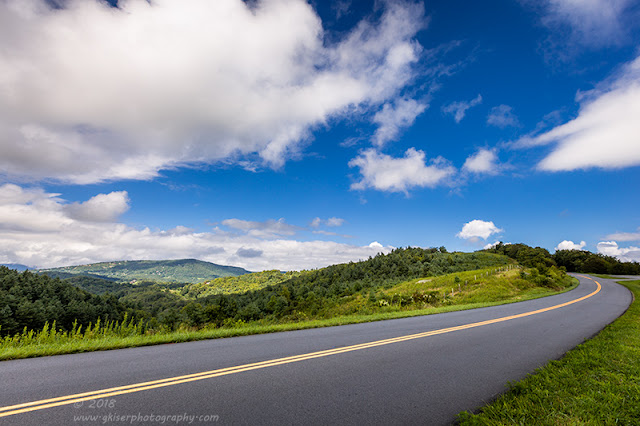
What's a day on the Blue Ridge Parkway without actually shooting the road itself.  Well, I admit that is a new thing I'm doing these days.  Years ago, I would occasionally shoot the roadway, but here in the last year or so, I have found that some of my favorite Parkway images actually include the road.  The sweeping turns really do make fantastic leading lines for a sense of depth to the image.  Of course, the fences that line the Parkway make for some outstanding complimenting elements as well.


Melancholy Barn
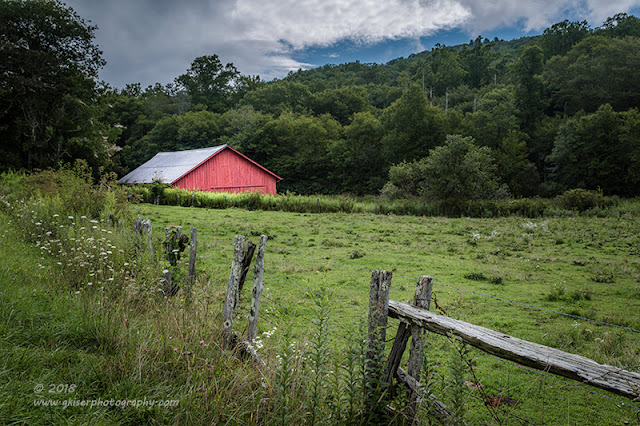
As luck would have it, the sky that was pretty much void of clouds an hour ago, was now getting overloaded with clouds.  Those clouds were bringing some rain as well.  It wasn't enough that I was having problems shooting, but it was enough to get me thinking about packing up and going down the road to see what else I could find.  Before packing up the camera though, I wanted to try shooting the barn once again.  I've shot this thing in pretty much all seasons and in all conditions.  There wasn't anything overly special about it today though.  The lighting was flat by this point, and there was a bit of cloud interest above.  The only thing that really stood out was the barn itself.

I decided to include the fence in my composition as a leading line and a bit of foreground interest.  I really wasn't all that excited about how the picture was coming together, but pressed on regardless.  When I got home and started to process it, I wanted to include it in my day's collection, but it just wasn't really speaking to me.  The barn wasn't standing out at all in the field when I did my normal edit on the image.  I started to think about what I could do to really make it pop and decided that by reducing the vibrancy of the image I could dial in the saturation on the red siding and really get it come together as an image.  When I was done, I was actually rather impressed with how it came out.  While not an award winning picture, it does capture the essence of how I saw the barn at the time of capture.  There is enough blue to balance out the red, and the green is rendered almost neutral with this edit keeping the attention in the image where it needs to be.


Sidewinder
I did move on down the road and ended up a little ways further up the Parkway near the Thunder Hill Overlook.  This is one of my perennial favorites for sunrise, but I have shot here at all different times of day.  As I came around the corner, I noticed that the clouds were looking pretty good here and decided to pull off to the side of the road.  I went ahead and fitted my 16-35mm lens along with the Singh-Ray Color Combo Polarizer since I was planning on shooting at an angle to the sun.  

I started out working some compositions of a section right next to the MST, but wasn't really liking how the lighting was working out.  I decided that while I was waiting for the lighting to chance, I would go ahead and shoot the Parkway headed towards the main overlook.  I used the Parkway as a nice swooping leading line cradling the fenced field, and ultimately sending your eyes to the mountains range in the distance.  To be completely transparent about this image, I have flipped it left to right to allow the eyes to read it better.  I don't really count this as image manipulation as it doesn't change the content, only the direction.


High Country Clouds
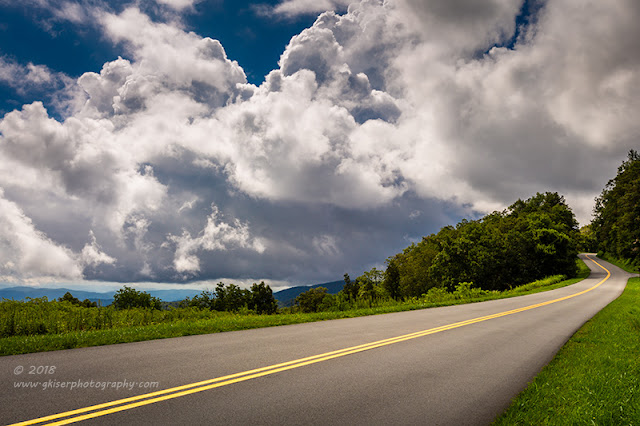
While I was shooting the road I noticed that the behind me, the clouds were really looking crazy beautiful.  I changed my position and framed up another image that took full advantage of the clouds.  I used the Parkway once again to be the leading line which carries the eyes through the frame.  These clouds really didn't need much help, but I liked effect the road added.  Again, when I was processing it, I decided to flip the image left to right to improve readability since our eyes are designed to enter a page on the left and carry through to the right.


Dreaming in Color
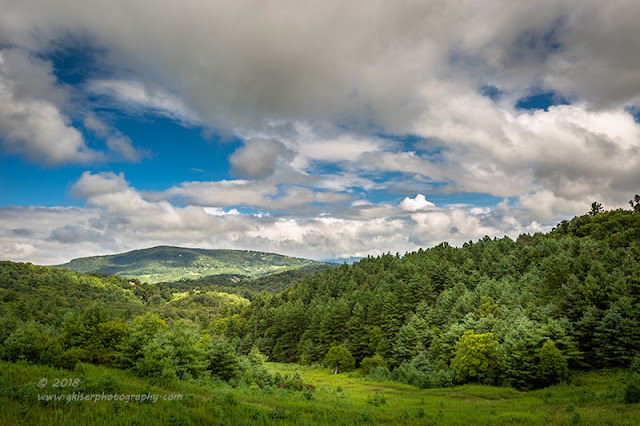
With the clouds really coming to life, I decided that it would be a good idea to try my original shot once again.  The clouds really made the image completely different from what it had looked like previously.  The lighting was a little better on the landscape as well.  It turned out that this final image was the one that I ended up being the most happy with.  Shortly after this shot, the sky turned mostly overcast as had happened down the road.  It was time to load up and head back to the house since it was about to be noon.

I got everything packed away and I started heading North once again looking for 421.  As luck would have it though, I passed by one of my favorite locations and the lighting looked really good.  Yeah, I had to get turned around to give it a try once again.  This is another location I have shot in pretty much all seasons and in all types of lighting.  Some I have liked better than others, so there was no reason not to give this a try again today.


Dreaming Field
The clouds were looking great overhead so I wanted to make sure I was going to be able to capture a good chunk of the sky.  I went ahead and fitted my 16-35mm lens along with the Singh-Ray Color Combo Polarizer.  I started to work my way up and down the road in an attempt to find the right spot.  The weeds growing at the fence made for a very difficult time getting the right composition.  There were only a few places that I could shoot from without getting tall weeds in the frame.  Fortunately, the clouds lasted a good bit of time and allowed me to get several different variations on this image.

At the end of this series of shots I really did call it a day.  I went home with a total of 193 new frames shot.  I was really thinking I had done more like 130 or so.  I really am having a hard time estimating my shutter clicks on these treks.  It took me about five hours to cull the images and then edit the remaining 33 images.  When it was all said and done, I had found 21 images that I liked enough to keep in my collection.  The rest of them went out with yesterday's trash.

Since it is so late already, I will be waiting until tomorrow to figure out which images are going in the gallery, and to start posting to social media.  At least the biggest parts of the Trek are done.  I have been going strong since 3am this morning.  I have put in 20 hours or work, driven over 250 miles, and still have a bit more to do tomorrow.  The life of an artist, it is a labor of love.

Tory's Isolations

Wednesday, August 1, 2018

With lots of rain this week and going into work late, I figured that shooting a waterfall might be a pretty good idea this morning.  The weather was right for it with deep, low clouds and even a little bit of mist here and there.  The trick was finding somewhere I could go that wouldn't take too long since I needed to be at work around 10.  That pretty much limited me to Hanging Rock which was about 40 or so minutes away from home, and an hour from work.  That would give me enough time to do a little working of the scene.

Tory's Character
My day started at about 5am, and I was on the road around 6.  I could have gone into the park itself and shot any number of the five waterfalls accessible from the main parking lot, but I've been happy with the images I've shot there.  The one that I have been wanting to do a little more work with has been Tory's Falls which is outside of the park on Charlie Young Rd.  This waterfall is the tallest in the park, but is also the one that needs high volume water flow to really present well.  Most of the time I have shot this, there has been but a trickle and that has been disappointing.  With several heavy downpours in the area I was hopeful for a little different look at this waterfall.

The hike wasn't long at all, in fact, I think it was just 0.2 mile from the parking area, and it took me about five minutes to get there.  When I first saw the waterfall, I was not all that excited as the volume of water wasn't exactly what I was hoping for.  Regardless, it was better than previous times, and for what I was wanting to do, it was fine.

I've shot this waterfall many times and have included the entire setting, and moved into isolations before.  I would really enjoy another opportunity to shoot the entire scene with a wider angle lens, but unfortunately the trees have gotten a little overgrown in the foreground, and another tree has started to infringe on the top of the waterfall.  I just can't get the view I really want for a wide angle shot.  On the other hand, the sections that I like to work as isolations were perfectly clear and visible.

Textures in Paradise
Like I mentioned, I have shot isolations here in the past.  For this, I have used my 70-200mm lens racked out to 200mm.  This waterfall is a good distance away from the closest platform that you can shoot from which means that even at 200mm, I'm getting a pretty broad view of the waterfall.  Something that I had not tried before was using my 2x extender on the long lens which effectively makes it a 140-400mm lens.  This was the combination that I chose to use, and I added a B&W polarizer.  I didn't go with my Color Combo because the colors that were there were super saturated already with the spray from the water.  The Color Combo would likely put those colors over the top for what I was wanting to capture.  After mounting the camera on the tripod, I started to move inch by inch looking for the right angle to get the shots I was wanting.

It was actually quite different looking at this waterfall through the eyes of a 400mm lens.  I could pick out detail shots within the detail shots I had done before.  The water flow was really good for these shots as well.  With the deep clouds and low light, I was able to keep a sharp aperture of f/16 and still shoot with a 20-30 second shutter speed.  Normally, I don't like to go that long, but it really worked to create a mist where the cascades were dropping.  That was just the effect I was going for, and it worked out great!

Refreshing Steps
I shot about 20 different compositions focusing on different aspects of the waterfall but seemed to come back to the same sections over and over.  The orange stones and green moss were just the perfect splashes of color for the scene.  In fact, I had gone planning on shooting black and white isolations, but after seeing how the color really helped the image, I left them all as full color.

I would have stayed a bit longer and tried a different lens, but it was starting to rain.  Since I had shot this waterfall many times with my other lenses I figured there was nothing really new to gain.  I packed things up and started back to the car so I could maybe do a little rural exploration on the way to work.  When I got to the fork in the trail, the rain had let up a little bit.  I opted to continue on to Tory's Den to see what I could do with it.

I've tried to shoot the den several times in the past but have never been quite satisfied with the outcome.  Mostly, I had problems with the sky being overexposed, or the shadows being too deep inside.  The compositions had been lackluster as well.  Since I was here and had time, I thought I would give it a try once again just to see what I could come up with.

Lost Souls
When I completed the very short hike to the den I found that the light was pretty good with just a touch of warmth.  I looked at what I had to work with and decided that I would go for the gusto and fit my 16-35mm lens.  I started to work compositions that showed the entire cave and the forest around it.  I even included the stairs to the left.  For these, I opted to fit a 3-stop ND Grad to control the sky, but in the end, I didn't like the light gray of the clouds behind the trees.  It was just too contrasty, and pulled the eyes away from the actual cave.  The shot that I found that I liked the best was a simple one that I needed no filters for.  I had gotten in close, and racked the lens out to 16mm to really accentuate the foreground rocks, as well as the shape of the cave.  There was enough even light that you could even see some detail in the back of the cave, but that was just enough to capture the imagination of what was in there.  From this angle, the cave actually started to look like a spade, which I thought added to the geometric appearance of the image.  It was the foreground rocks that really made this image pop though, and I am pretty sure that this is my favorite image of the den that I have ever shot.

As I was working the den, the rain returned, and I decided it was time to get in the car and start looking on the back roads for additional subjects.  I took the scenic way to work, and found a few more locations that were pretty good for pictures, but all of them would have required permission from the property owners to make the images work.  I didn't have time for that kind of conversation so I decided to take notes of what and where so that I could return later and do the subjects justice.  At least I have a direction for my next rural session.

At the end of the day, I had a total of 30 frames captured.  As I started to weed out the shots I didn't want, I realized that my favorites were all of the same section of the waterfall, so I really worked on finding the best compositions to actually process.  I found three of those that I thought were really strong images.  With the cave, I reduced the 10 frames down to just one which captured the essence of the cave without the distracting elements that I had been dealing with.

It was a short day, with only an hour and a half in the park shooting.  I had another 45 minutes of successful scouting as well.  With that it was time to go to work.  It would be the following day before I could get the images edited and ready to go on the Internet.  I am not a fan of waiting this long to go through the pictures, but sometimes you just have to do what you have to do.

Behind the Camera: Long Exposure Waterfalls


Welcome back to another installment of my monthly Behind the Camera feature.  In this feature, I try to give a little insight into my photography by answering a question that has popped up during the previous month.  This month's topic comes from Beth Reed through Facebook.  The question she posed is: How do I get that look with my waterfalls, where the water looks "thick" and blurry?  That effect has also been called "milky" in several of the comments I've seen with my waterfall pictures.

This question came at a really good time since I have recently been to two different locations for waterfalls.  Big Creek and Roaring Fork Falls are some of my favorite places to go for moving water photography.  I had also done a couple of videos specifically dealing with how I captured moving water.  So, thank you Beth for suggesting this topic.

There is a huge division out there on how best to photograph moving water.  In one camp, you will find a group that likes a fast shutter speed which freezes the motion in the water and shows the detail down to the droplets as they move over the obstacles.  In the other camp, you will find those which prefer to slow the shutter down and create a motion blur with the moving water that results in the silky look.  For those of you who have viewed my White Water Gallery Room here, you will know without a doubt which camp I fall in.  Yes, I like milk spilling over my rocks, and I don't cry about it either.


What a Rush
So, how is this look achieved?  It all comes down to having a long exposure which is very dependent on the light falling on the scene.  For the most part, I much prefer cloudy days for waterfall photography because it limits the light that is available and it reduces the highlights as the sunlight comes through the trees.  This starts me out with a great advantage for capturing these scenes.  It still doesn't get me all the way there though.  Lets take a look at this one video that I shot a few weeks ago at Big Creek which talks a little about one of the major filters that I use with this type of photography.


A polarizing filter is probably the most important part of photographing water, moving or otherwise.  A good quality polarizer will make a world of difference in your photographs because of one simple fact.  This filter will remove glare from water particles which is arguably a good portion of your composition.  With the glare removed, the colors are more saturated, and you can actually see beneath the surface in many cases.  This benefit will expand to the surrounding elements in your composition as well such as foliage as they have a certain water content in the leaves.  The polarizer will add to the saturation in your greenery as well.  I've done a quick comparison shot of the scene that I shot the video of to illustrate this concept.


In this shot, I set the camera for a proper exposure without any filters on the front of the lens.  I set it up as I would with a filter with the exception of the shutter speed.  F/18 was plenty for the depth of field that I wanted here, and the meter ended up suggesting a shutter speed of 0.4 seconds which was not enough to really blur the water like I would want, but more importantly, there is a lot of glare on the surface of the water, as well as the wet rocks.  It is not a bad image, but the water looked a little too chaotic for my tastes.


When I added the Color Combo Polarizer, my exposure immediately darkened due to the reduced light entering into the lens.  I kept all of my settings the same with the exception of the shutter speed.  Allowing for a proper exposure based on the meter and histogram, I slowed the shutter to 2 full seconds still at f/18.  That is a huge difference with just a single filter being added.  You can see the that the glare is removed, which yields a darker scene overall.  The rocks near the white water are now rendered dark without the glare from the spray.  Even the greens are saturated now as the glare was removed from the leaves.  Keep in mind that both of these images are straight out of the camera with no editing except for the resizing for posting here.  These are the RAW images that I captured.

There are instances where I need a slower shutter speed than I can achieve with a polarizer alone.  In these situations, I will add a Neutral Density Filter which has a sole purpose of reducing the light that enters the lens.  If it is a good quality filter, there will be no color shift once it is added.  I find that when shooting on very overcast days an ND filter is not needed.

The key settings here are to shoot the image with your lowest ISO, which in my case is 100.  I could go down to 50, but that actually degrades the quality of the image slightly and introduces a bit of noise as it is a product of internal manipulation on the part of the camera.  You can only access this by unlocking the feature in a menu.  To maintain the highest quality image, I leave it at the native low ISO of 100.  I also keep the lens stopped down a good bit for depth of field when shooting any landscape, but for waterfalls, the narrower the aperture the better.  I try not to go all the way to the narrowest aperture as diffraction becomes an issue.  In these images, f/18 works well (f/22 is the highest aperture for the lens).  Diffraction is a byproduct of a very narrow aperture where you actually start to lose sharpness throughout your image while maintaining a wide depth of field.  Some images can handle diffraction better than others, and lens quality has a lot to do with the degree of diffraction.

The idea behind all of this is to reduce the light that enters the lens to allow for a slower shutter speed.  In the case of the aperture, it is a double benefit since you get more depth of field with the narrower aperture as well as the ability to use a slower shutter speed.  The only negative to a very narrow aperture is that you will absolutely have to use a tripod for your waterfall photography.  There is no way to hand hold a camera at 2 seconds and keep the image sharp.  A tripod will also allow you to repeat the composition with different shutter speeds to see what you like the best.  Of course, I recommend a tripod for all of your landscape shots because you are assured to get a stable and sharp image the vast majority of the time.  You just have to be careful not to bump the tripod with your feet.  To take full advantage of a tripod, I would also recommend using the mirror lock up feature and either using a remote release, or using the self timer (2-seconds) so that your image doesn't suffer from the mirror flipping up and causing a slight vibration.


Cascades of Summer
Here we have the final image after some editing in Lightroom.  This is where the beauty of RAW comes into play.  You can see what I started with in the above comparison shots.  There was a good deal of contrast in the scene and not much was in the middle tones.  By bringing out the details in the image, I was able to get details under the water's surface, in the cascades of the water, and on the rocks themselves.  The greenery also comes alive.  The process here took about 5 minutes to do, and required nothing out of the ordinary from any other digital negative that I have shot.  There was only a small amount of cloning done on the bottom of the frame as there were some distracting bright rocks at the bottom edge of the frame that wanted to pull your eyes away from the scene.


Dreaming in Black and White
This pretty much covers the how behind my water photography, but why is it I like this milky presentation so much more than a fraction of a second shot?  Simple...I love seeing the patterns that the water reveals as it moves.  When you freeze the shot, the patterns are lost in the chaos of the flow.  By slowing the shutter down, you are no longer looking at the droplets, you are looking at how the water deals with obstacles in its path.  That is part of the power behind water, and to me, the beauty of it.  In this shot of Mouse Creek Falls, I isolated the flow of the water to show the patterns and textures that I am talking about.  To really accentuate those qualities, I stripped the color from the image and added a bit of contrast.  You can spend a lot of time looking into this image and picking out abstract designs, and even a face or two.  The slow shutter simplifies the motion, and makes it almost melodic in nature.  That is completely missed with a snapshot of moving water.

Don't get me wrong, I don't dislike those freeze frame water shots.  I have seen several that were absolutely beautiful.  I just don't look at them for long at all.  Almost as quick as the camera was exposed, my eyes lose interest because there are no patterns to pick out.  I look, I appreciate, I move on.  When I look at a long exposure waterfall, I will stop and look at it much longer.  I start to really look "into" the photograph.  I become emotionally connected.  It is no longer a shot of a specific waterfall, it is a piece of art that is to be appreciated.


Royal Veil
When it comes right down to it, I think that all photographers can agree that the idea of an image is to prompt involvement from the audience.  We want people to look, to study, to consider, and ultimately to react to the image.  In order for that to happen, there has to be something to draw you in.  When we look at a waterfall in person, we are seeing the water moving somewhere in the area of 1/60 to 1/125 of a second (estimated as our eyes don't have a shutter speed).  This would be a typical exposure on a sunny day.  By slowing the shutter speed, we are essentially creating the look of movement which gives life to the water and allows us to imagine seeing the motion which can't be captured except for video.  It makes it more interesting to see, and will prompt the viewer to examine it closer.

There is one major pitfall that we haven't discussed yet when it comes to these long exposure shots.  We have the camera set up on the tripod, we have our polarizer and maybe a neutral density filter attached.  Using our remote and the mirror lock up we are all set for a great long exposure of moving water at 3.2 seconds.  But wait, if we are using a long exposure to capture motion, would it not stand to reason that the breeze blowing around might cause motion in the greenery?  Yep, when you are shooting a long exposure, you will capture any movement as a blur, and that includes branches and leaves.  There is no cure for this (outside of a multiple shot that blends elements) other than waiting for the wind to die down a bit.  I have stood patiently for 15 minutes or more waiting for a lull in the wind before releasing the shutter.  It also pays to take several shots of the same thing on breezy days because you will then have several to choose from to see what blur you are willing to live with.


Into the Gorge

Now that you are comfortable shooting waterfalls, you can use some of the same concepts with other landscape shots that include moving water.  take for example, this shot from the top of Upper Creek Falls in the Pisgah National Forest.  The main focus here is the sky and the landscape in general.  The visual anchor is the small cascade, less than a foot tall in the foreground.  Had I shot this at a normal shutter speed (a fraction of a second), I would have lost a lot of the visual impact of the small cascade and it would not have worked nearly as well as an anchor.  By slowing the shutter speed using a polarizer, and a couple of ND grads (5 total stops of light loss), I was able to get the exposure to around 1 second.  It wasn't much, but it was enough to get the effect I was after.


Enter the Basin
There are, of course, exceptions to my methods of photographing waterfalls.  There are times where a faster shutter speed is much more appropriate.  For instance, this shot of Linville Falls was done using a shutter speed of under a second.  I could have easily gone longer based on the lighting conditions, but I've found that any time I photograph this kind of volume spilling over rocks that too long of an exposure loses the detail in the water that I am after.  The water is fast enough that even a fraction of a second will render this very silky.  I've done Linville with 2 second exposures, and even longer in the past and it just turns into a white blob with no character.  By speeding it up a touch, I still keep the details and excitement.


High Shoals Falls
Water slides are another time where you don't want to blur the water too much.  With this image of High Shoals Falls, the way the water moves over the rocks leaves very little detail to be picked up.  As with the previous image of Linville, less is more with your exposure.  I shot this one a just under a second.  The water flow was quick enough that I didn't need much exposure time, and this still allowed for some detail in the water, while rendering it silky smooth.

These are just some considerations while shooting waterfalls, and you can always allow more might into the camera by opening up the lens (lower f/number), or changing the ISO to make it higher.  You do still want to use a polarizer as the removal of glare is very important for this type of photography.  After your exposure, check the image on the LCD review and zoom in.  While it won't be an exact representation of the captured image, it will give you an idea if you got the effect right.  As with everything in photography, season to taste.  there might be a time when you want just a touch of glare to make a rock stand out, maybe you want things to be a bit darker than they actually are.  You are the photographer, you make the decisions on how your images are captured and then presented.

Thanks for the topic Beth!  Remember if there is ever anything that you would like to know more about with my photography, just ask.  Your question might just be the next Behind the Camera topic!